

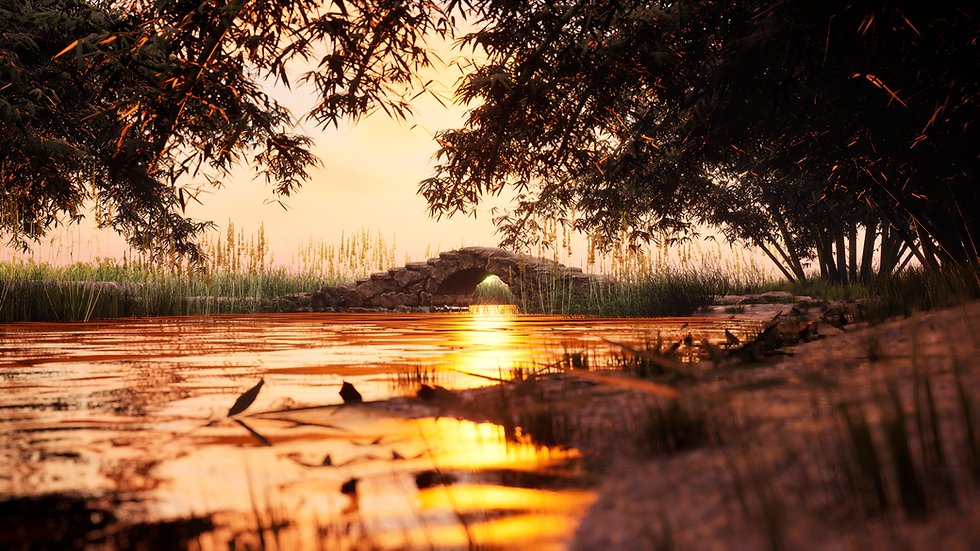
Sun Set Bambo Grove
Final Render
Beauty Shots


My last project is a hard surface environment for my second piece. I aim to create an outdoor environment that focuses on creating foliage, natural assets, and landscapes that enhance the environment.
Break Down
Concepting


I drew my main inspiration from this photo.
This is a photo taken in Guilin, China. It's located in southern China. It features the iconic twisting river, surrounded by a bamboo forest and rice fields, with an old stone bridge that has served people for generations.
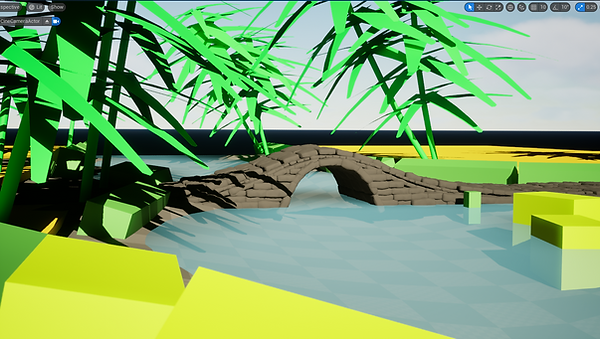
Blocking Out
First, I sculpted a landscape inside Unreal using the Unreal landscape tools. Then, I went into Maya, modeled some basic shapes, and used Houdini to generate a stone bridge block out procedurally. I imported these into Unreal to create a quick blockout of the scene.
I ended up with a smaller-scale scene. I like how it's fitting the theme I'm looking for. A small stream flows through a bamboo grove, with an old stone bridge spanning it, and rice fields on both sides.
Kit Over View


Stone Bridge

This is the hero prop for the scene. I use Houndini to model the bridge procedurally. I had a great amount of fun creating this asset, and also some interesting problems I managed to solve. Now let me show how it's done.
First, I generated some rocks by putting a cube in a foreach loop. In the loop, there is a noise node, and an integer attribute is added to each rock that's been generated in the loop.

When I first approached how I should generate the stone bridge, I thought I could scatter the stones along a curve and control the shape of the curve to form a stone bridge.
And that's what I did. I started with a curve, added a mask on the curve by using the distances along geometry node, then I untitled wrangler to add a simple vex;
"@P.y = @mask; "This makes the curve points look at the mask on the curve to determine its Y position. This allows me to control the shape of the curve by adjusting the mask.

Initially, I attempted to scatter the rocks on the curve itself, but this approach didn't work out. I realised that even if I could make it work, managing all the curves would be too challenging. Then I came up with a different solution: I sweep a poly plane on the curve where I can control the number of columns and spans, and then I can scatter rocks on each vertex.
Next, I add a scale attribute to enable scale randomization for the rocks and an integer attribute, allowing me to select which rock is scattered on the plan.

Then I use a copy to point node and connected the rocks I created earlier, then I got the top part of my stone bridge.

I just repeated these steps and changed the shapes of different layers of the stone, and came up with the block out of my hero prop.

The block out of the stone bridge is a proof of concept, now it's time to make it prettier.
Refinement


Screen shots of refine stone bridge
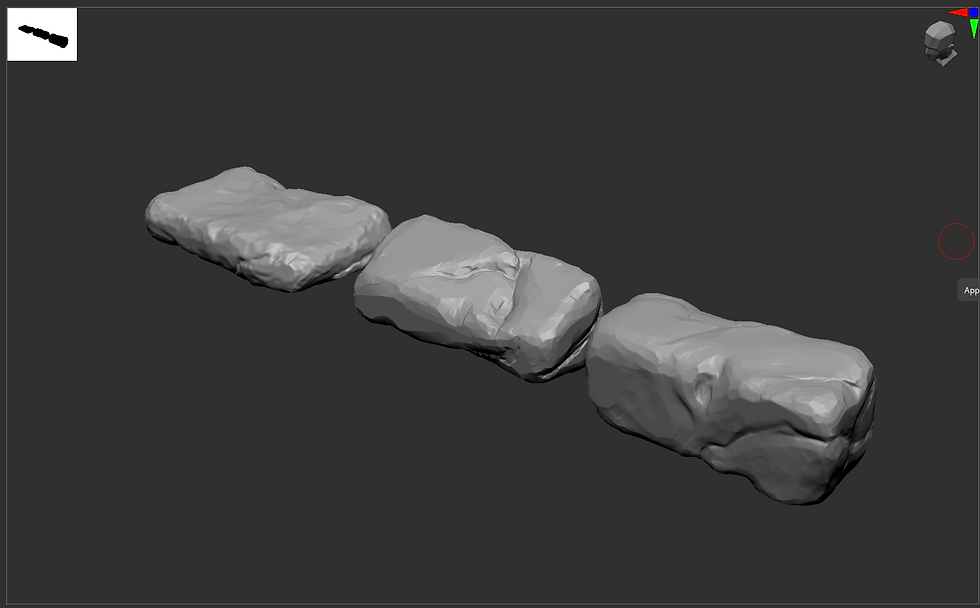
The first step I took was to go into ZBrush to sculpt some rocks. I sculpt three types of stones by looking at my references: a squareish rectangle stone, a triangular-ish stone, and a flat stone for the top layer.

Then I imported them into Houdini, applied some rotation for general variation, and assigned an ID to each rock. I then scattered the layer I wanted them to be in.

I didn't change much from my block-out nodes. I added a noise attribute to the sweep plane, so when rocks scattern on the plan will be uneven like in the real world, and at the end, I did mirror for less repetition and a cleaner nodes tree.


For the arch and the top layer, I change the way I approach them.
For the arch, I didn't use a curve. I just used a cylinder and cut it in half to get the perfect half circle. It will be tough to get the perfect half circle if I use my curve method for this.
And for the top layer, I scatter them like a very wiggly staircase. And I added a rotation attribute to get some rotation randomizations.


For the last step, I merged everything into one mesh, then I converted it into a VDB and remeshed it. The resaon for this step is because there are way too many over laping geos between each layers, and it will be a nightmare to clean them up for UVing. By converting the mesh to a VDB and remeshing it, we will eliminate the overlapping geos for an easier time for clean up and UVing.

Texture
Now it's time for texture. I imported the finished model to ZBrush and used the decimation master to decimate the mesh. Then I imported the decimated mesh to Rizom for UVing. Rizom made the UVing decimated mesh much easier.

Here is a quick video showing you how I textured the stone bridge.
I like to texture my props from bottom to top; I make the base material first, then create all the grunges and roughnesses on top of the base material. As you can see in this video, I created a base stone material first, then worked my way up to different types of grunges, moss, and the last layer, a roughness layer to create the illusion that the bottom of the bridge is wet.
For the storytelling aspect of the stone bridge, I've explored how the grunge is laid out on the bridge. On the sides, it's old grunge from constant rain and water damage over time, and on top of the bridge, it's fresh dirt from people who use this bridge.
Ground Material


Land Scape Material Shader Overview

I use the Unreal Ground Material Shader for the ground material. This made textureing landscape very easy and straightforward to manage.
There are three materials in total, and I blend them using height blend and texture bombing to reduce repetition.
Ground Material Overview
I created all the ground material myself in Substance 3d Designer.
Pebbles


Mud V1


Mud V2


Foilage


Foilage Kit Over View


I made all my foliage in Speed Tree, and I use Mage Scan for the bamboo leaves.
Speed Tree Graph Overview


Unreal Foilage Mode
With all the foliage created, I imported them to Unreal and used the foliage mode to paint the foliage the way I wanted.
Each plant has its own different setting for the best outcome. I've added min and max scaling, rotation, and even though I only made one type of each type of plant, they all look different from each other. This way, I can save a lot of time and performance.

